Industrial valves don’t last forever. They don’t come cheap either. In many cases, repair begins within 3-5 years of use. However, understanding and knowing the common causes of valve failure can lengthen the valve life service.
This article provides information on how to repair faulty valves, the common causes why valves need fixing and the signs that valves are already faulty.
Valve fail
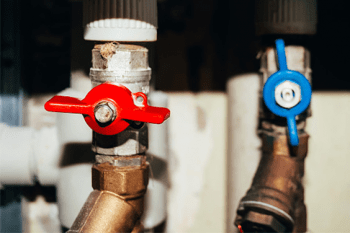
When a signal loss occurs, the valve opens. A fail open valve would prevent upstream pressure from building up in a back pressure application, like holding pressure on a separator. When the signal fails, the valve closes. A fail-closed valve would safeguard downstream equipment from excessive force in a pressure-reducing application like air compressor suction control.
Fail close or fail open: how to determine
Valve Failure Position: Fail Open Valve or Fail Closed Valve?
Fail-close valves block the fluid flow, while fail-open valves allow. A stem indicator is the valve failure position.
- Valve fails to close if the indication arrow is “closed” without pressure.
- Valve fails open if the indicator arrow is “open” without force.
The breather plugs show control valve status.
- Valve actuator bottom breather plug fails.
- Valve actuator’s top breather plugs break.
What is the control valve failure open?
If a signal or power is lost, a valve opens. Air pressure closes these valves. The valve opens automatically when air pressure drops. Firefighting systems use this valve. After the fire cuts electricity, the valve opens, and water flows, usually allowing the fire extinguisher system to work.
Fail open valve symbol
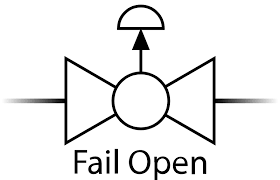
Image Source: Assured Automation
When signal loss occurs, the valve opens.
Fail open valve example
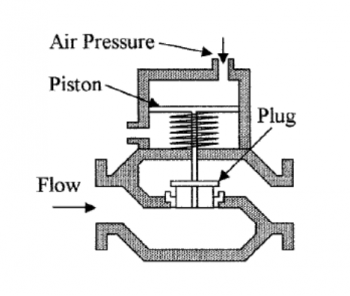
Image Source: SIO
In situations, fail open valves can stop fluid or gas flow. A fail-open valve can stop toxic chemicals or gas from escaping a pipeline breach.
Fail close valve symbol
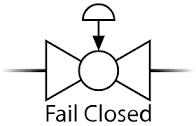
Image Source: Assured Automation
When failure conditions are discovered, a device or system is set to shut down and stop operating.
Fail close valve example
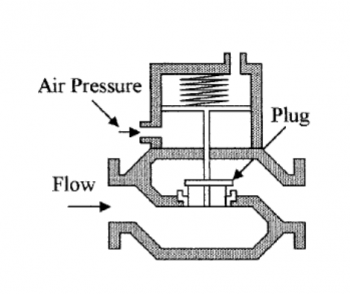
Image Source: SIO
Failing closed refers to a setting that causes a device or system to physically or electronically shut down and stop functioning when failure conditions are discovered.
What Makes Valves Last Longer
The lifespan of the valve depends on three factors: the quality of the seal, internal and external environment and the frequency of operation.
If the seal works perfectly, the valve works well too. Choosing the right seal ensures better performance and maintenance.
On the other hand, factors such as pressure, temperature, as well as the type of media are worth considering. Lastly, if the valve works all the time, the maintenance period is around 3 months to ensure optimum condition.
How to Know It’s Time to Repair Valves
#1 When there is internal leaking
One of the reasons why there is internal leaking is that the valve cannot have a total shutoff. According to international standards, each valve type has a maximum allowable leakage (MAL). A tell-tale sign that the valve needs repair is when the leakage is beyond the required range for MAL
#2 When there is external leaking
There are a few culprits of why external leaking is present. In many circumstances, there has been improper maintenance. It is also possible that the material of the valve and the media are not compatible. Extreme temperature can also cause external leaking.
#3 When the valve becomes noisy
Water hammer is the term used in industrial applications to describe the sound made by valves. This is an indicator that the valve needs maintenance. The disc banging the valve seat causes this noise.
#4 When the valve is no longer working
Obviously, when the valve is not working anymore, it high time to salvage or repair it. While many valves can be repaired, there are those that repair is almost near impossible.
The Common Causes of Industrial Valve Failures
#1 Improper Valve Size
The wrong valve size calculation can lead to either undersized or oversized valves. This is important because the flow of media depends on the size of the valve. An oversized one can decrease the pressure whereas an undersized valve can cause bottlenecks.
Solution
Find an online valve sizing calculator. There are different formulas for liquids as well as for gases. If manual calculation is too tedious, an online one will just do the trick.
This would make looking for the right kind of valve much easier. As a point of reference, also look at the Kv value found in the product description. Also, consider the required flow rate as well as the pressure drop range.
#2 Material Incompatibility
The media type, the seat material and the material of the valve body should match. Incompatibility means that the valve is more prone to wear and tear.
Solution
Check the product description for the type of material used for the valve seat and body. These should follow the industry standards as to what media to use. Also, check for valve damage if you suspect there was an incorrect use of material. Changing the valve is costly. Replace the parts that are in contact with the media to something that can withstand it.
#3 Elastomer Damage
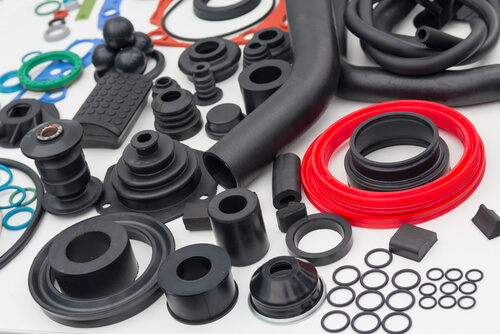
Elastomers are often used as valve seats, gaskets or O-rings which act as a seal. Because they are elastic, they are the natural choice for sealing applications. This also prevents the contact of the metal valve body with the media. Examples of elastomers used in industrial applications include nitrile, Aflas, and Teflon.
Elastomer wear damage is caused by the natural movement of the fluids. Most often, the cause would be the incompatibility of the elastomer and the media.
Solution
Consider the compatibility of the elastomer and the media. Check the product description on what types of media to use with elastomers. When buying, check the description of the valve. If elastomer is not compatible, find other sealing components that is suitable for the elastomer.
Once the elastomer seal has dents, cracks and the likes are already apparent, replace this component. Also, check if there are wear patterns that follow the media flow, it means that the latter is too abrasive.
#4 Valve Stem Wear
Smaller components such as the valve stem packing or the gland bolts cause wear and tear to the stem. Furthermore, the constant movement of the valve disc, as well as the contact of the corrosive, also contributes to the wear and tear of the stem.
For the stem packing, the lack of elasticity that narrows the sealing gap causes the wear. This is especially true in the case of the combination of inelastic packing material and gland bolts.
Solution
For the smaller valves, the only solution is to replace them after all, they are readily available. However, for larger valves, replacement is not cost-effective. The best solution is to upgrade the current valve.
Before checking the stem, check the other smaller components first such as the gland studs, bolts and the stuffing boxes. The next step is to check the stem if it needs reworking or replacement.
#5 Cavitation
Cavitation often occurs in control valves with liquid media. Two factors that contribute to cavitation are fluid velocity and pressure drop. Cavitation happens when there is a change in the pressure levels and velocity of the fluid.
Bubbles form when liquid pressure is lower than the vapor pressure in the valve. These bubbles somehow stop the flow of media. When liquid pressure recovers from the declined level, the bubbles collapse, causing damage to the valve. You can check the process in the video for cavitation.
Solution
Make sure that the application is using the right valve. If it is a wrong style or size, there is a greater chance of cavitation. Use anti-cavitation valves for water and liquid applications. If using control valves, place them in areas where the valve has a lower orientation in relation to the pipes.
#6 Water Hammer
Water hammer is the condition where there are abrupt pressure spikes in the valve. It is one of the most destructive forces that can wreak havoc to the valve body. Three factors create water hammer: how fast the valve closes, how fast the liquid is the moment the valve closes and what the pressure wave along the pipe is. You can also check this video for a further introduction to water hammer.
Other significant factors that contribute to this phenomenon are the thickness of the inner valve cavity, the strength of the pipe and the pressure of the media.
Solution
Use a throttling valve to minimize water hammer. Also, utilize a fast acting on/off valve such as the butterfly valve. A slow acting one is also suitable as this reduces water hammer pressures. Instead of manually opening and closing the valve, use a hydraulic actuator to allow faster opening and closing.
#7 Pressure and Temperature Exceeding the Required Parameters
Valves have specific pressure and temperature requirements. Going beyond what the valve can withstand can damage it.
Solution
Before installation, check the product requirements to ensure that no pressure and temperature upsurge happens. Routine maintenance and repairs are important. Replace damaged parts due to increased temperature and pressure damage.
#8 Faulty Actuator
Actuators come in three forms: manual, powered or automatic. Actuators manage the entry and exit of media and the flow of media, pressure, and temperature. That being said, choosing the wrong actuator shortens the life of the valve because the valve wears out easily.
The incorrect use of voltage can trigger overheating. Not only that overheating can cause fire, but it can also totally damage the actuator.
Solution
Strong input from the actuator can actually damage the valve stem and disc when the valve positions to close or open. If the media is slow-moving, choose actuators that suit this. If to avoid the loss of pressure, choose an actuator that can easily open or close.
To know whether the valve is damaged or it is just the actuator that is acting weird, turn on the manual override. It the valve seems ok, the actuator is damaged.
If the valve doesn’t move, the problem is the actuator. Additionally, check the valve stem for any damage. A worn-out valve stem affects how the actuator moves.
Installing its sensitive components should be far from the actuator when there is high pressure or the possibility of high vibrations. This is to protect the sensitive parts from damage.
NEMA (National Electrical Manufacturers Association) has set ratings on electrical valves for safety.
#9 Incorrect Installation
Some valves are easier to install than others. Sadly, many cases of valve failures come from incorrect valve installation. Take for example the installation of swing check valves. Some people have been installing them in the wrong orientation. There are symbols to follow for easier installation.
Solution
Most valves are installed in an upright position unless specified. Make sure that the person installing the valve has enough skills and training to properly perform the task.
#10 The improper operational and set pressure differential
Operational pressure is the amount of actual pressure present upon operation. On the other hand, set pressure is the standard pressure the pipe operator sets for the pipeline system. The problem often arises the operational pressure is close to the set pressure.
Solution
Check the integrity of the valve. Particularly look at the valve disc, seat and stem. Also, check for leakage. Replace the damaged parts if necessary.
Factors such as the material of the valve, the media, seat tightness, among others, place a minimum of 10% differential between the operational and set pressures. However, the ideal difference is 20%.
#11 Reverse Flow
Reverse flow refers to the instance that the flow of the media suddenly changes. This, together with water hammer, are two of the most common and highly damaging causes of valve damage.
Solution
Prevention is the key. Installing a silent check valve or any valve that closes fast would greatly improve valve performance.
#12 Debris
Thicker particles such as in slurries cause abrasions on the seat. These can get stuck in the valves, making the valve remain open or closed. Additionally, debris, when it hardens in the valve, can potentially cause the valve components to break.
Solution
Regular maintenance and valve cleaning are important. These remove debris and prevent the debris to harden and further damage the valves
#13 Incorrect Maintenance and Repair
Incorrect repair and maintenance are not only damaging, but it is also costly and time-consuming.
Solution
Make sure that the valve orientation is correct. Use the guides in the valve body that can help in the proper installation of the valve. Make sure that directions are followed as to the valve orientation.
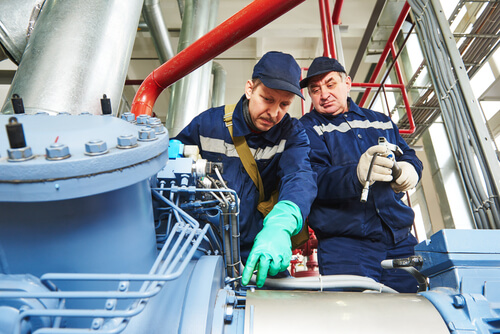
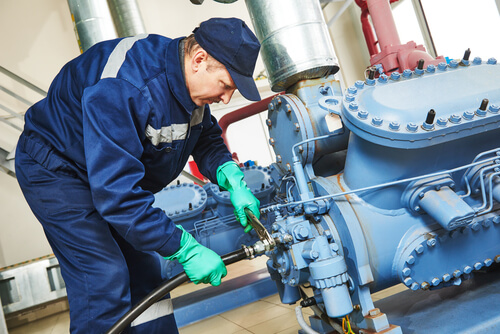
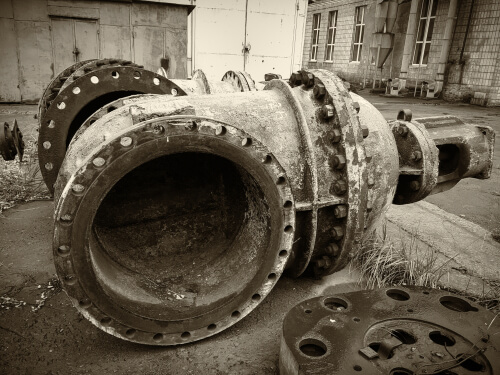
Industrial valve repair
Industrial valves are mechanical tools to control system liquid or gas flow by opening, closing, or partially obstructing channels. The process flow is made safe and reliable by valves. The flow of different resources, such as oil, gas, water, or pulp, is often controlled by large plants or factories with numerous pipelines. The industry depends on valves at this point.
Gate valve repairs: how to fix a gate that doesn’t close
How to Repair a Leaky Gate Valve
Sediment inside gate valves prevents it from shutting. Sediment lodges between the lowering gate and the valve body. Ball valves don’t have this issue since they act differently than gates that lift and drop inside the valve body.
- If silt or mineral deposits prevent a gate from closing, try rinsing the valve.
- Open a sink faucet to turn on the water supply.
- Open and close the valve gently. Release the packing nut above the valve body and around the valve stem to liberate the valve handle.
- Remember to tighten it after that. Loosening it one turn should work.
- When the gate is dropped, water will wash away some silt. As long as excessive force is not used, this is entirely safe.
- Regularly opening and closing a gate valve prolongs its life.
- It exercises the valve. Experienced building managers integrate this into routine maintenance. Exercise water valves to prevent silt buildup.
Replace a gate valve with a ball valve
A ball valve can replace a gate valve. To remove pieces, use a torch.
- Turn off and drain the water. Open the valve.
- Heat the valve-pipe junction.
- Try moving the valve with large channel locks. If so, remove it.
- Cutting the pipe and pulling off the valve may be easier than heating a neighboring elbow and moving it laterally.
- To solder the new valve, clean, flux, and heat the joints.
- Like the valve, you can solder a repair connection over a pipe cutter.
- Apply heat with the valve open.
Multi-port valves are used to redirect media or provide several media sources. Ball valves are faster for on/off control than gate valves since they require a 90° turn to control the ball position.
How to fix a leaking ball valve?
To troubleshoot a leaky ball valve in your piping system, determine the leakage’s cause. Here’s how to repair a ball valve:
- Stop, fluid flow.
- Remove, stem handle.
- Unscrew, packing nut.
- Check the packaging and internal components. Check for damage. Diagnose the valve and choose a solution:
- Replace worn packing materials.
- Replace it.
Best Practices to Avoid Valve Failures
Like in many cases, prevention is better than cure. Regular maintenance works by highly skilled technicians. Often times, valves issues arise because of human error. To solve this problem, employ skilled and highly trained personnel to install and maintain the valve and piping system.
Cleaning the valves and making sure that these are devoid of debris. If necessary, install filters to separate the debris from the flow media. Flush the pipes to reduce buildup.
In addition to this, lubricate the valve. The valve is made up of movable smaller components. Lubricating these means less friction, which reduces wear and tear and improves performance.
Check the valves and its parts from time to time. Replace the components that have shown damage. This will extend the service life of the valve. Also, make sure the valves are properly installed.
In Summary
Valve replacement is highly costly. That is why getting industrial valves is a must. Always check the valves at the first sign of valve damage, repair what needs to be repaired and replace the damaged parts. Or you can also get the great manufacturers in this complete valve manufacturers guide in China.